
Crowdstrike OAuth2
Configure the action connector for Crowdstrike OAuth2.
In this guide, you will create new credentials for Crowdstrike OAuth2 in order to enable containment and remediation tasks.
Available actions
The following actions are available after you set up the Crowdstrike OAuth2 action connector. Keep in mind, additional permissions are required.
Block files
Isolate device
Release devices from isolation
At the end of this configuration, you will provide Radiant Security with these values:
Client ID
Secret
Base URL
Prerequisites
Create credentials for Crowdstrike Oauth
Log in to your CrowdStrike Falcon console as an administrator.
From the upper left corner, click the Menu icon.
Click Support and Resource, then select API Clients and Keys.
Click Add new API client under the OAuth2 API Clients section.
Add the following information:
Name:
Radiant Security API AccessDescription:
Enable Radiant Security to take containment and remediation actions.Permissions:
PermissionReadWriteUse CaseDetection
X
Endpoint telemetry
Hosts
X
X
Endpoint telemetry, endpoint device context, endpoint actions
Incidents
X
Endpoint telemetry
Indicators
X
X
Endpoint telemetry, endpoint actions
Click Add.
Copy the Client ID, Secret ID, and Base URL for the next steps.
Client IDClient Secret KeyBase URL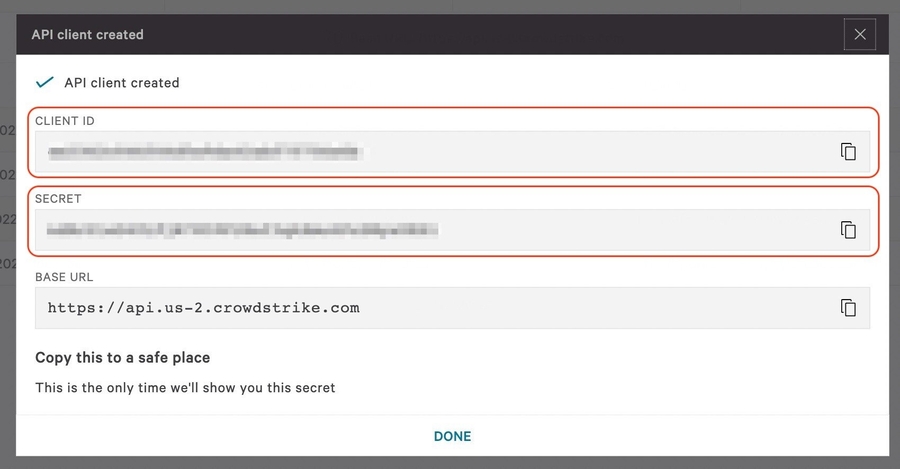
Important note: Be sure to document and store the Secret carefully, as it cannot be retrieved later.
Add the data connector in Radiant Security
Log in to Radiant Security.
From the navigation menu, select Settings > Data Connector and click + Add Connector.
Select the Crowdstrike OAuth2 vendor from the list and click Data Feeds.
Under Select your data feeds, select SSD and Crowdstrike API and click Credentials.
Under Credential Name, give the credential an identifiable name (e.g.
Crowdstrike Credentials).Under Required Credentials, add the API Base URL and the API Token that you copied from the previous section.
Click Add Connector to save the changes.
Add an action connector
From the navigation menu, select Settings > Action Connectors and click + Add Connector to create a new action connector.
Select the correct vendor from the list.
Confirm that the selected credentials are correct.
Click Add Connector to finish creating the new action connector.
Last updated